 7 hours ago
4
7 hours ago
4

Recipe Highlights
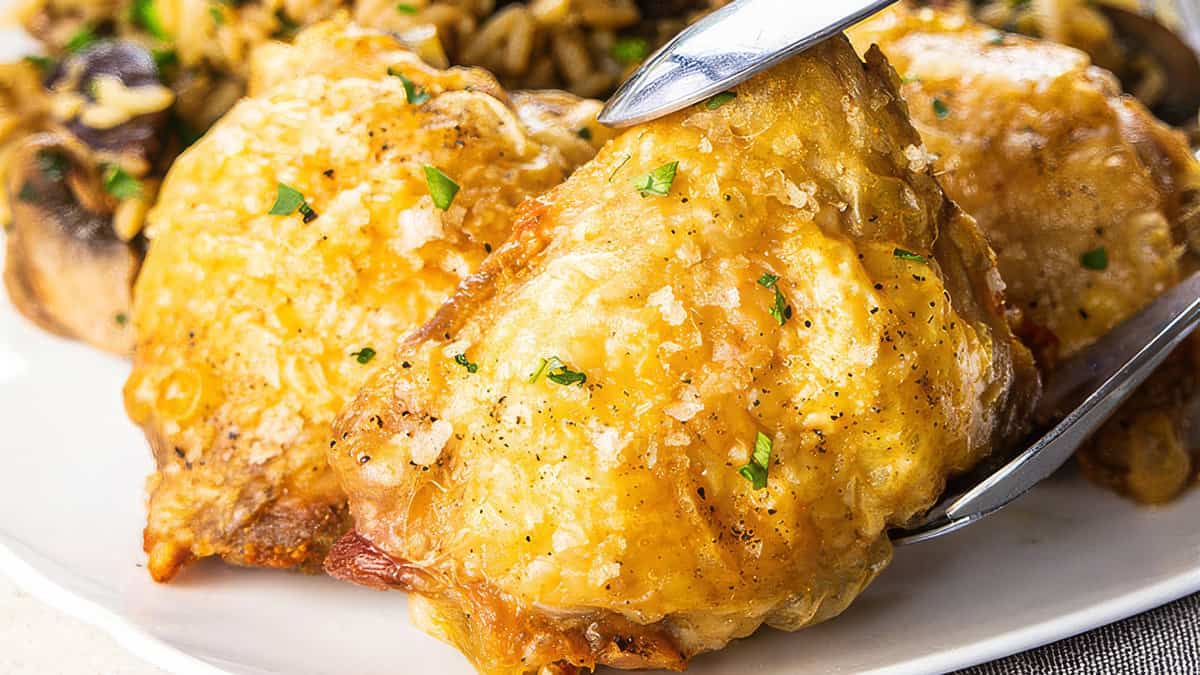
I have fond memories of packing Chicken Nanban (Fried Chicken with Tartar Sauce) in my son’s bento lunch for school when he was just 6 years old. In fact, kids and adults alike love this recipe that combines juicy fried chicken, zesty nanban sauce, and creamy Japanese tartar sauce. With layers of contrasting flavors and textures in every bite, it’s a dish the whole family can enjoy.
- Light, crunchy crust that soaks up the tangy nanban sauce
- Ready in about 50 minutes
- Perfect for weeknight dinners and bento the next day
If you are craving fried chicken, try my Karaage (Japanese Fried Chicken), Nagoya Style Fried Chicken Wings, and Fried Chicken with Scallion Soy Sauce recipes next!
Table of Contents
What is Chicken Nanban?
Chicken nanban (チキン南蛮) originated in the 1950s in Kyushu’s Miyazaki Prefecture. The word nanban means “southern barbarian” and originally referred to foreigners, especially traders from Portugal who arrived in Japan in 1543. Later, it came to describe foreign influences and Western-inspired foods. What sets this fried chicken apart is its flour-and-egg crust soaked in a tangy marinade and served with rich tartar sauce.
Ingredients for Chicken Nanban
- boneless, skinless chicken breast
- nanban sauce – rice vinegar, soy sauce, mirin, sugar
- tartar sauce – boiled egg, onion, cucumber, Japanese mayonnaise (I use Kewpie Mayo), rice vinegar, salt, pepper
- flour and egg
- neutral oil
Find the printable recipe with measurements below.
Jump to RecipeHow to Make Chicken Nanban
- Make the sauces. Boil an egg and finely chop it with onion and cucumber. Mix with mayo, vinegar, salt, and pepper to finish the tartar sauce. Bring the nanban sauce ingredients to a simmer in a saucepan, turn off the heat, and cool.
- Cut and coat the chicken. Butterfly the chicken breast to make thin cutlets of even thickness. Season with salt and pepper, lightly coat with flour, and dip in beaten egg.
- Fry the chicken twice. Deep-fry until golden. Rest, then fry them again for 30 seconds per side.
- Coat in nanban sauce. Immediately spoon the tangy sauce all over while the fried chicken is hot.
- Serve. Slice into bite-size pieces, top with tartar sauce, and enjoy!


Nami’s Recipe Tips
These simple tips will help you make Chicken Nanban perfectly every time.
- Make the tartar sauce first and chill in the fridge – It tastes best served cold alongside the hot fried chicken!
- Use rice vinegar for the nanban sauce – It’s milder than other vinegars and creates a balanced sauce with gentle acidity.
- Soak the chopped onion – A quick soak in cold water removes the sharpness from your tartar sauce.
- Butterfly the chicken – Thinner cutlets cook evenly and stay juicy.


- Fry at 340°F (170°C) – The right oil temperature is key for deep-frying. I check with an instant-read thermometer.
- Fry one piece of chicken at a time – This keeps the oil temperature stable between pieces. Read my How to Deep-Fry Food at Home guide for more helpful tips.
- Don’t touch it too soon – Fry the chicken undisturbed for at least one minute so the egg coating sticks.
- Coat with sauce while hot – Coat the fried cutlets right away in nanban sauce so the crust absorbs the flavor.

Variations and Customizations
Looking to change things up? Try these easy and tasty ideas!
- Use chicken thighs – Pound them with a meat mallet or cut into bite-size pieces before frying so they cook evenly.
- Skip the tartar sauce – Some versions—including the original version at Nao-chan restaurant in Miyazaki—leave it out.
- Make it vegetarian – Prep firm tofu following my Pan-Fried Teriyaki Tofu method then coat with your sauces.
- Make spicy nanban sauce – Add dried chili peppers or red chili flakes when heating your nanban marinade and let it infuse while the sauce cools.

What to Serve with Chicken Nanban
We typically serve Chicken Nanban as a main dish with a few sides. Here are my easy ways to round out the meal.
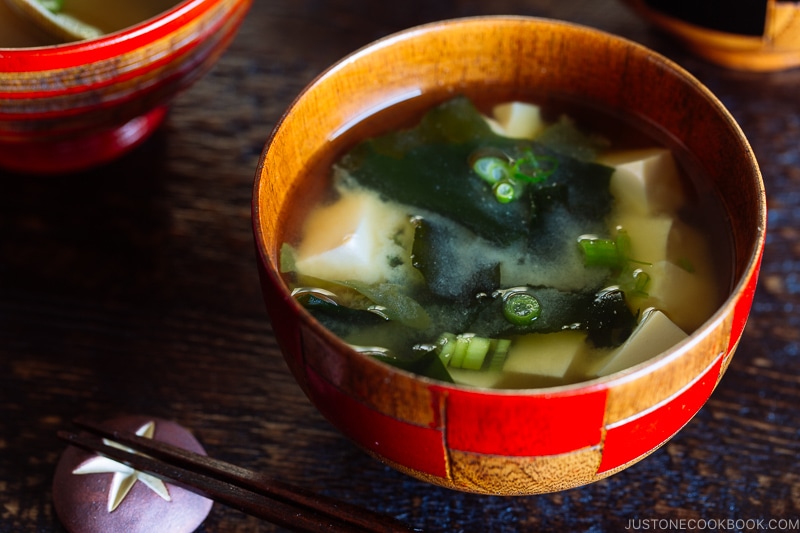
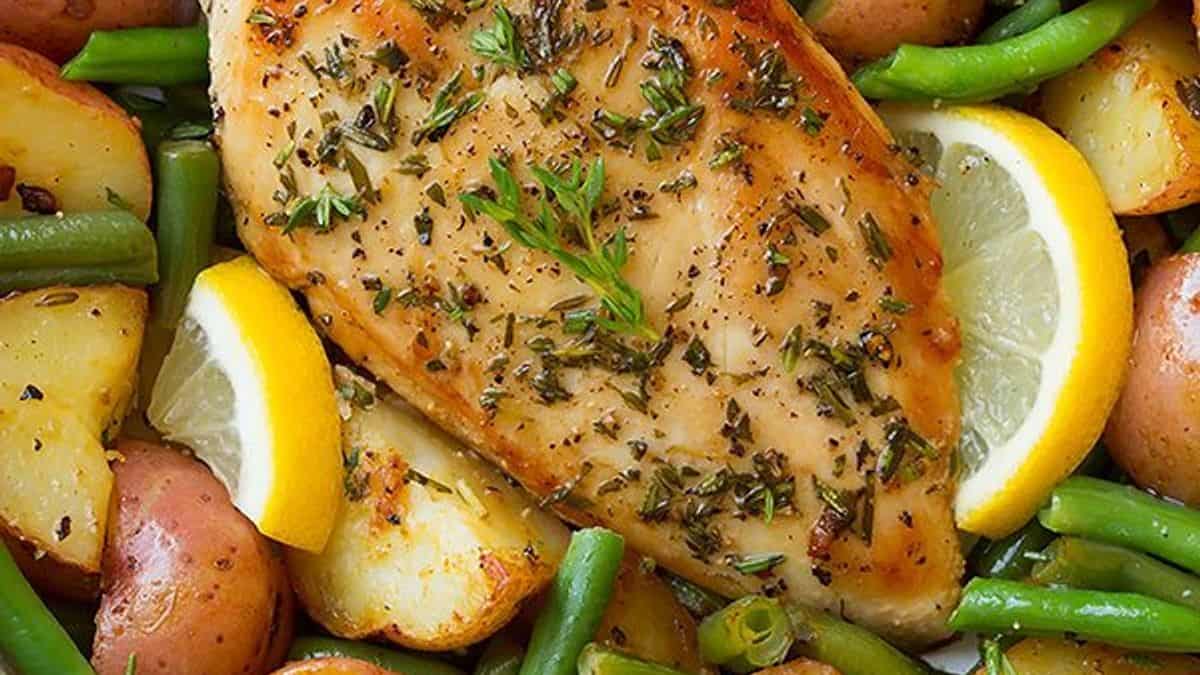
- As a main course – Serve it with my Homemade Miso Soup, pickles, and steamed Japanese rice.
- With a fresh salad – A simple green salad with my Japanese Sesame Dressing is refreshing between bites of chicken.
- In a lunchbox – Chicken Nanban Bento is a popular Japanese-style lunch. I usually pack Quick and Easy Tamagoyaki and Broccoli Blanched with Sesame Oil alongside it.
- With creamy sides – Pair it with Japanese Potato Salad or Japanese Macaroni Salad—easy sides you can prep ahead for the week.

Storage and Reheating Tips
To store: Cool the leftover chicken. Refrigerate in an airtight container for up to 3 days. Freeze for up to 1 month. Make the sauces fresh when serving leftovers.
To reheat: Reheat on a baking sheet in a 350°F (180°C) oven for 15–20 minutes if thawed, or 30–40 minutes if frozen.
FAQs
Why is it called chicken nanban?
The word nanban (南蛮) originally referred to foreigners arriving in Japan in the 1500s. It later came to describe Western-inspired cooking techniques like deep-frying (think tempura) and vinegar-based sauces. Chicken Nanban—sometimes spelled chicken namban—reflects this influence.
What is chicken nanban sauce made of?
Nanban sauce is made using soy sauce, rice vinegar, mirin, and sugar.
Is chicken nanban the same as karaage?
While both are fried chicken dishes, the coatings are different. Karaage uses potato starch and/or flour, while chicken nanban is coated in flour then dipped in egg before frying. Karaage is typically served plain or with a squeeze of lemon, while chicken nanban is dressed with nanban sauce and served with tartar sauce.
I’d love to hear how yours turned out! 💛 Please leave a star rating and comment below to share your experience. Your feedback not only supports Just One Cookbook but also helps other home cooks discover recipes they can trust.
- 1 boneless, skinless chicken breast (10.5 oz, 300 g)
- 1 large egg (50 g w/o shell)
- 1 Tbsp all-purpose flour (plain flour) (plus more, if needed)
- ⅛ tsp Diamond Crystal kosher salt
- ⅛ tsp freshly ground black pepper
- 2 cups neutral oil
Gather all the ingredients.
Make the tartar sauce first so it has time to chill in the refrigerator—it tastes best served cold alongside the hot fried chicken.

To Make the Tartar Sauce
Place 1 large egg (50 g w/o shell) in a saucepan and cover with water by 1 inch (2.5 cm). Bring to boil over medium heat, then reduce to a gentle simmer for 12 minutes until fully hard-boiled.

Transfer the egg to an iced bath to stop the cooking. Once cool enough to handle, peel and set aside.

Mince ¼ onion as finely as possible. Place it cut side down. Make ⅛-inch (3 mm) vertical slices to within ½ inch of the root end. Cut 2–3 horizontal slices toward the root.

Slice crosswise ⅛ inch (3 mm) for an even mince. Mince finer by running your knife through them in a rocking motion. Submerge the onion in cold water for 5–10 minutes.
Nami's Tip: Soaking the onion removes the sharpness.

Cut off the ends from ½ Japanese or Persian cucumber. Slice in half lengthwise. Remove the seeds with a spoon.
Nami's Tip: Scooping out the seeds keeps excess moisture out of the tartar sauce.

Cut the cucumber halves lengthwise into thin strips.

Finely mince them crosswise into ⅛-inch (3 mm) pieces. Place in a medium bowl.
Nami's Tip: Add as much or as little as you like—more for a chunkier, fresher sauce, less for a creamier one. I use about 3 heaping tablespoons. Reserve any leftover cucumber for salads or cold udon noodles.

Drain the onion in a fine-mesh colander. Squeeze out the excess moisture and add to the bowl with the cucumber.

Mince the boiled egg, especially the egg white. Add to the cucumber and onion.

Add 3 Tbsp Japanese Kewpie mayonnaise, 1 tsp rice vinegar (unseasoned), ⅛ tsp Diamond Crystal kosher salt, and ⅛ tsp freshly ground black pepper. Mix well until smooth and well combined. Cover the bowl and refrigerate until serving.

To Make the Nanban Sauce
Combine 2 Tbsp soy sauce, 2 Tbsp rice vinegar (unseasoned), 1 Tbsp mirin, and 2 Tbsp sugar in a medium saucepan. Bring to a gentle simmer over medium heat. Stir until the sugar dissolves completely, then remove from the heat.

To Prepare the Cutlets
Butterfly (split) 1 boneless, skinless chicken breast: Cut horizontally with a knife, stopping ½ inch before cutting all the way through, then open flat like a book.
Nami's Tip: If the chicken is still cold from the refrigerator, leave it on the counter for 10–15 minutes. Cold chicken lowers the oil temperature too quickly, leading to uneven cooking.

Cut in half down the middle to get two cutlets. Pound both sides with the back of a knife or a meat mallet until the cutlets are an even thickness throughout.

Season both sides with ⅛ tsp Diamond Crystal kosher salt and ⅛ tsp freshly ground black pepper. Coat with 1 Tbsp all-purpose flour (plain flour). Dust off any excess. Set aside.

To Fry the Chicken
Add 2 cups neutral oil to a medium pot. Bring it to 340ºF (170ºC) over medium heat.
Nami's Tip: I use an instant-read thermometer for accuracy. If you don't have one, stick a chopstick in the oil; when tiny bubbles appear around the tip, the oil is ready.

Meanwhile, crack 1 large egg (50 g w/o shell) into a shallow tray and beat until thoroughly blended. Dip one floured cutlet into the egg, turning to coat both sides completely.

FIRST FRY: Gently lower one chicken cutlet into the hot oil. Leave it undisturbed for the first minute so the egg coating can set, then cook for 4 minutes total, flipping halfway. Transfer to a wire rack to drain.
Between batches, scoop out any fried crumbs with a fine-mesh strainer to keep the oil from getting dark and bitter.
Fry the second cutlet and transfer it to the rack.
Nami's Tip: Fry one cutlet at a time to keep oil temperature stable—and don't climb above 340ºF (170ºC), or the outside will darken before the inside cooks through.

SECOND FRY: Raise the oil temperature to 350ºF (180ºC). Carefully place the first chicken cutlet in the oil and fry again for 30 seconds on each side, until deep golden and crisp.
Nami's Tip: Be careful of bigger oil splatters than during the first fry. This happens when the moisture underneath the crust vaporizes and hits the hot oil.

Remove the chicken from the oil and transfer to a wire rack or paper towel to drain. Repeat with the second cutlet.
Nami's Tip: If you have an instant-read thermometer, check that the chicken's internal temperature is at least 165ºF (74ºC). The chicken will continue cooking from residual heat as it rests.

To Coat with Nanban Sauce
Reserve 2 tablespoons of the nanban sauce in a small bowl for serving. Add the rest of the sauce to a tray.

Add the hot chicken cutlets to the tray immediately and spoon the nanban sauce over both sides until all surfaces are evenly coated.

To Serve
Slice each cutlet crosswise into ¾-inch (2-cm) pieces. Transfer to individual plates and top with a generous spoonful of tartar sauce. Drizzle with the reserved nanban sauce.

To Store
Store the leftover chicken in an airtight container. Keep in the refrigerator for 3 days or in the freezer for up to a month. Do not freeze the tartar sauce. Make a new batch of both sauces when you serve leftover fried chicken.
Reheat defrosted or frozen fried chicken on a baking sheet lined with aluminum foil or parchment paper. Bake until warmed through at 350ºF (180ºC) for 15–20 minutes if defrosted, or 30–40 minutes if frozen.
Variations and Customizations
Looking to change things up? Try these easy and tasty ideas!
- Use chicken thighs – Pound them with a meat mallet or cut into bite-size pieces before frying so they cook evenly.
- Skip the tartar sauce – Some versions—including the original version at Nao-chan restaurant in Miyazaki—leave it out.
- Make it vegetarian – Prep firm tofu following my Pan-Fried Teriyaki Tofu method then coat with your sauces.
- Make spicy nanban sauce – Add dried chili peppers or red chili flakes when heating your nanban marinade and let it infuse while the sauce cools.
Calories: 617kcal, Carbohydrates: 26g, Protein: 36g, Fat: 40g, Saturated Fat: 7g, Polyunsaturated Fat: 19g, Monounsaturated Fat: 10g, Trans Fat: 1g, Cholesterol: 308mg, Sodium: 878mg, Potassium: 510mg, Fiber: 1g, Sugar: 21g, Vitamin A: 308IU, Vitamin C: 3mg, Calcium: 51mg, Iron: 2mg
Did you make this recipe?
Tag @justonecookbook on Instagram so we can see your delicious creation!
Editor’s Note: The post was originally published on January 22, 2011, updated with new images and revised recipe on March 9, 2022, and republished with more helpful information on March 28, 2026.


 English (US) ·